
Cleaning and Handling Art Glass
Sometimes “less is more” and that is especially true when it comes to handling of art glass. Clean and handle as little as possible. Some handling and moving of your pieces is, however, inevitable. Just remember – lead glass may be heavy but the lead oxide additive makes the glass quite brittle. Never pick up a piece by its “arms”, or “fingers”, or “spikes” or “curls”. Always pick up from the base or at the widest, thickest point of the piece. And better safe than sorry – use both hands, Also, avoid having people who don’t collect glass handle, wrap or pick up the glass. They are not accustomed to its weight or size.
When you must wash it, remember Chalet pieces are actually leaded crystal glass - repeated washings in very hot water or with a harsh detergent can damage the surface polish of your pieces. So:
wash one piece at a time in warm not hot water.
remove your rings – it doesn’t take much to leave a scratch or a “ping.”
never put it in the dishwasher.
always use a product designed for glass - recommended - Zep Glass Cleaner (Home Depot, Walmart etc.), It comes in a spray, foam or liquid and is non-streaking.
after washing, dry immediately.
do not place on a bare counter or drain board as you increase the chances of chipping or scratching.
do not hold your piece while drying by the handle of a basket or the feet of a vase as the twisting and turning motions of your actions can create undue pressure on the applied pieces or delicate tapering arms and cause breakage.
after the piece is dry, polish with a lint-free cloth,
if there is streaking, don’t re-wash but give only that area a spritz of a vinegar solution diluted with water and re-polish. Return to its place and only then tackle the next piece.
sometimes your purchases are filthy. For hard-to-reach dirt and stains in the bottom of long throated or narrow vases, pour enough vinegar into the vase to cover the mark. Then add baking soda. The two will react and often that is quite enough to remove most dirt.
do not stick things like wooden spoons or knife handles into the throat of vases. Use a soft bristled or ragged bottle brush.
for more stubborn markings, let stand for about an hour to further soften the mark or stain. Then empty and put about ¼ cup dry rice into the piece, add a little warm water and more vinegar and baking soda and swish the piece vigorously BUT carefully around. Remember do not hold by any handle, footing or stem.
then wash the piece as above (sometimes the baking soda leaves a film so this will most often be necessary). This combination of ingredients and gentle agitation is usually quite effective.
for surface stains and easier-to-reach deposits, try straight vinegar and a very little baking soda right on the spot. Do not scrub as baking soda may be a natural cleaner but it is also an abrasive.
“Goo Gone”, spray or liquid, works well to remove really stubborn sticker residue but usually just soaking for a few minutes in warm water will allow you to remove stickers easily.
you will often see pieces with lime and calcium stains and deposits. RUN don’t just walk away from those pieces as this type of stain is impossible to remove. Things tried and failed: CLR, denture tablets, nail polish remover, ammonia, rubbing alcohol and peroxide, jewelry cleaner, oven cleaner and fabric softeners. If you decide to buy a water-stained piece or discover a lime and calcium mark after getting home, “WD40” and “Orange Glo” wood polishing and conditioner (Canadian Tire) are effective in camouflaging the stain and minor surface scratches so that you may display.


Please leave a comment, make a suggestion or ask a question about this article. It will be answered promptly as feedback always welcome!
between washings, use the vinegar spritzing in place - take your spritzer with you when you’re dusting. Dust using an implement like the “Swiffer 360” wand. This type of dusting tool allows you to thoroughly dust in, around and over your pieces without actually having to pick them up. Thus, reducing the chances of pieces knocking together as can occur when you move them around.
using fabric softener sheets when dusting removes static cling that causes pieces to attract dust and hair and seems to have a longer-term keeping your glass freer of dirt
protect your glass by applying an ‘anti-dust” product like “Polyshield” (available online) for long-term benefits
when displaying your pieces, make sure your shelving can bear the load. If you have glass shelves, they should be tempered and at least ¼” in thickness with good supports. Do not use a very long “run” of any shelving without supports at mid-point as well as at either end.
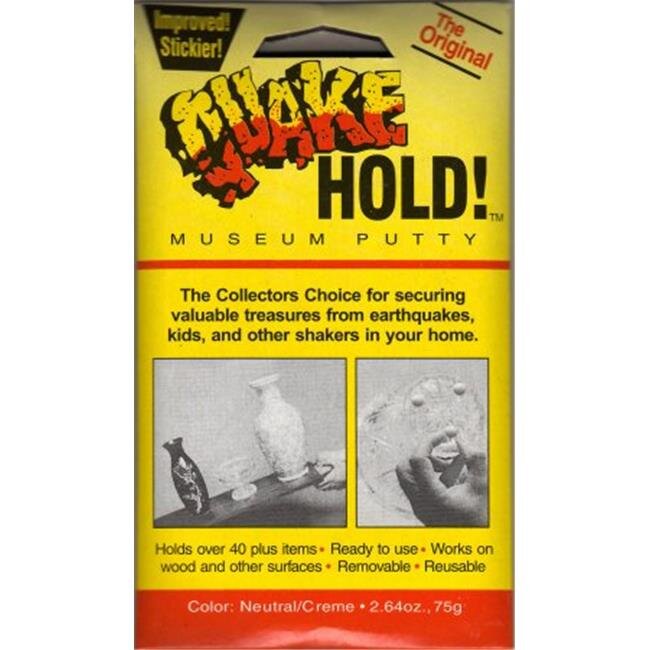
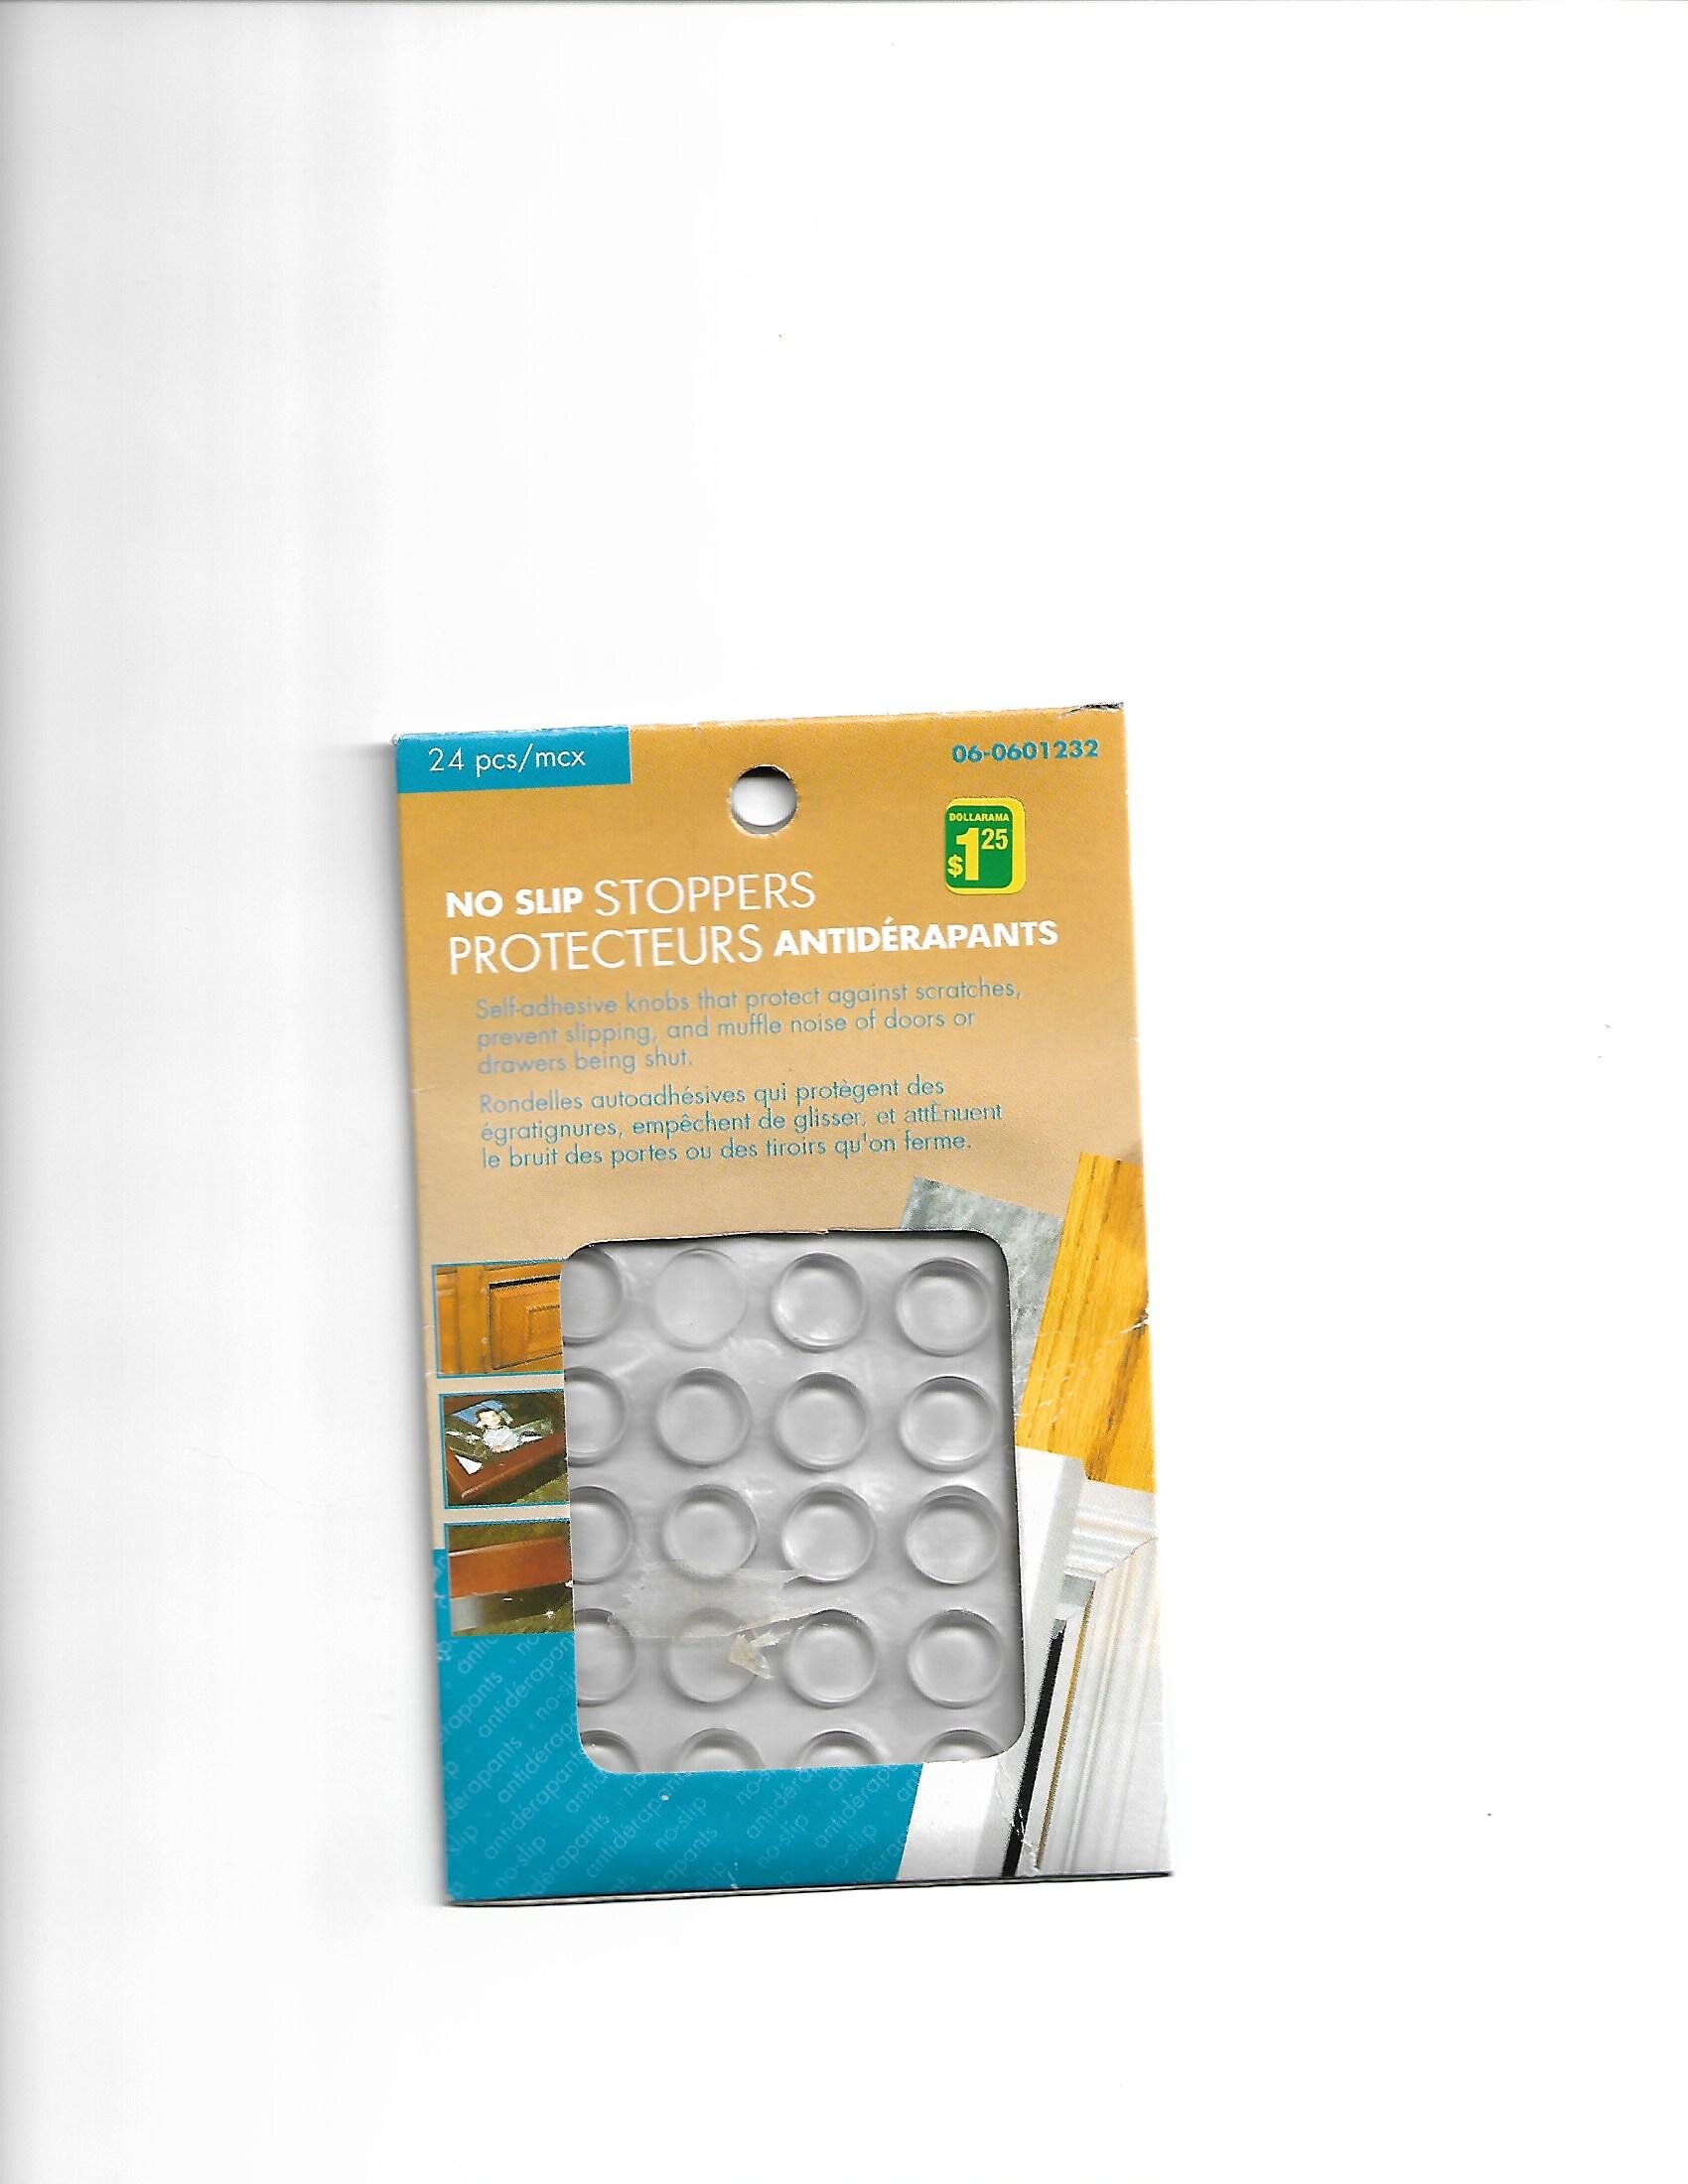
prevent slippage and scratches by applying “NO SLIP” self-adhesive silicone pads (Dollarama has very good ones) to the bases of your glass. You can also use “museum putty” which is available at Walmart or Michaels. As well, if you have extra non-skid gripping backing (commonly used under area rugs) handy – cut fragments to fit under your pieces. I do not recommend using the “non-slip” tapes as they will leave residue on both your shelving and your glass.
Glass is glass and vintage glass has been around longer than most so you might fall in love with a “less than perfect” piece. What can you do? You don’t have many options and they are all fairly obvious –either position the piece so that you cannot see chips and scratches, learn to live with the flaws or take a chance on having the piece professionally restored. It is possible for minor surface scratches and chips to be “polished out” by a good jeweler or glass worker. Never try this yourself! Before you entrust a cherished piece to any “stranger” have that professional do a test-run on a like piece that is damaged or that you don’t mind risking. I have had one piece professionally repaired by a glass blower – a successful re-attachment of a figurine to its pedestal base but as the break was clean and there was no chipping, it was a relatively minor job. If you have a piece with a ground arm that is dull, apply a little clear nail polish to that area. Make sure it does not ‘glob.’ This will give it a sheen that is more in keeping with the gloss surface of the rest of the pieces so the repair is much less noticeable. Internal cracks can continue to worsen over time so if you have a piece with one of these “fracture lines” be prepared that you may lose it. One last tip - never leave your pieces in an unheated car or storage area – extreme cold can cause some pieces to shatter or crack all the way through.